Friday, October 10, 2014

Stanley Desk

I love the story behind a piece of furniture. Sometimes, I don't have the luxury of knowing exactly where something came from. In this case, I knew a good chunk of the history behind this lovely Stanley Desk.

In 1962, the woman I bought it from was 16 years old and worked at a furniture store in Chicago. The store carried Stanley Furniture. She really wanted this particular desk, but she didn't have that much money to spend on it. She was making 85 cents per hour. So, she had a co-signer and had two dollars deducted from her paycheck each week to pay for the desk.

Present day, she decided she didn't have any use for it, and up for sale it went on Craigslist, and then to me of course :) I restored what I could, but stained parts of it. The pulls are wood sculpted and make it an iconic piece. I also love that Stanley didn't forget about the back. It has clean lines and adds versitility to it. It doesn't have to be pressed up against a wall. This beautiful desk deserves center stage!
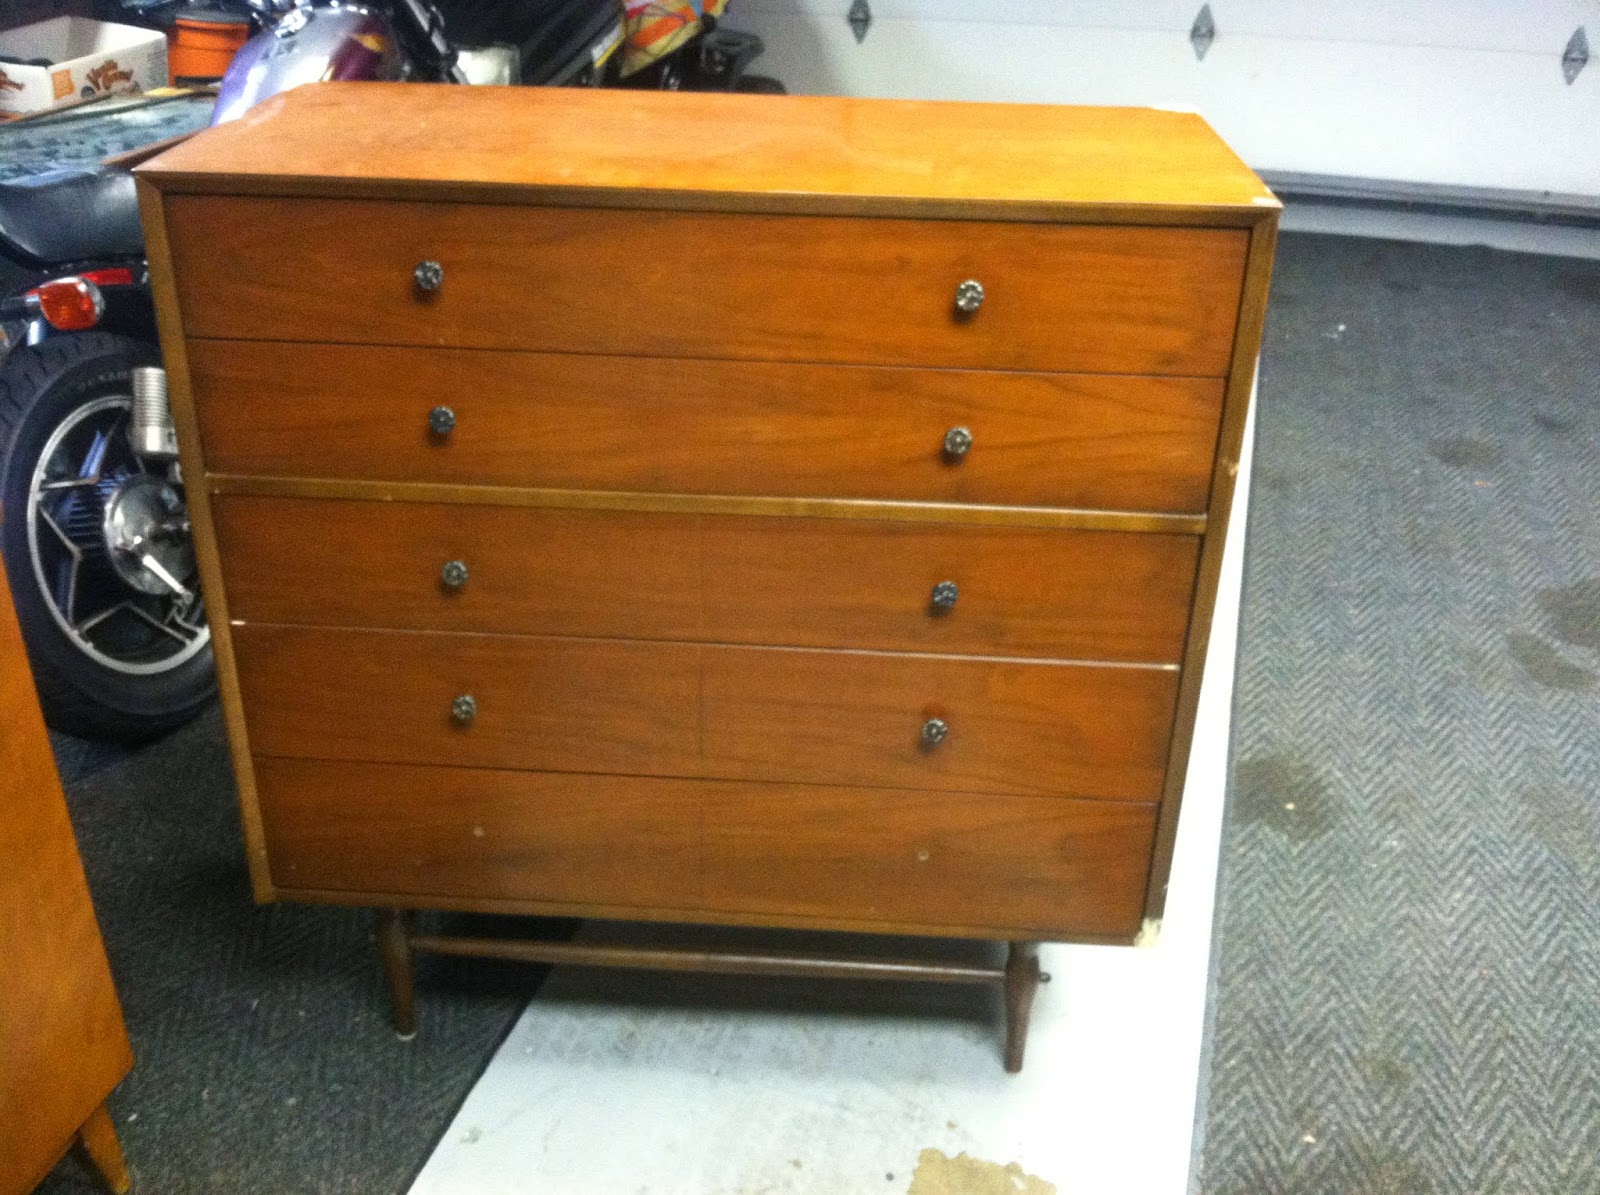
Before


Wednesday, October 8, 2014

Hold on to Hope

Your hope chest that is. Lot's of people don't know what to do with their Grandmother's hope chest. Don't put the for sale sign on it so quick. These are great storage chests for the end of your bed, front entrance hall or living room.

My dad's friend was cleaning out his house and didn't want the Lane hope Chest anymore and I gladly took it off his hands.  I spray painted the outside with Rustoleum White. I distressed and hand painted  the edges and the keyhole area with Rustoleum oil based paint. The inside was pretty much mint condition. I lightly sanded the cedar wood inside so that the cedar smell would be noticeable again. I also cleaned and scrubbed the green material on the folding top shelf until it was bright.


More MCM


Apparently, I can't get enough of MCM dressers. I'm drawn to them. The legs of MCM dressers are a lot of the time hair pin, and it makes for a visually interesting piece of furniture. Somehow those skinny legs hold up a sturdy, solid dresser.

In a Good Will out in St. Charles, I came across a Kroehler MCM dresser for only $13. It seemed a little unsteady and the hardware was there, just unattached. It turned out, there was literally one screw loose that was the cause of the wobbliness. I stained the drawers a Red Mahogany color and painted the outer sides with Rustoleum oil based black paint.
Before, but I already prepped for staining the drawers

After


The next MCM dresser I got a hold of was from a Craigslist ad. It was a Harmony House, Sears Roebuck dresser. Pretty good condition to start with. Solid wood drawers, veneer sides. 
Before

After
I painted the outside white, then distressed with steel wool, and that is it. I gold dipped the legs by taping off the rest of the base and spray painting with Rustoleum metallics in gold. This dresser is for sale HERE It also comes with a glass top.


Good Will Find: Broyhill Brasilia!

As I learn more and more about furniture, I have more and more respect for a quality made piece of furniture. Mid century furniture has been my latest fascination and I keep coming across really great pieces that I can't pass up. I even found a Broyhill Brasilia credenza at Good Will! I interrupted a morning meeting at the store because I had to get to the credenza and rip that sold sticker off of it before anyone else did. Only $30. Sold.

Restoring it was a fairly easy process because it was already in great shape.

  1. Wash with Murphy's Oil Soap for wood furniture.
  2. Wipe on Howard Restore-a-Finish in Walnut
  3. Wipe dry.
  4. About a half-hour later wipe on Howard Feed & Wax
  5. Buff until shiny :)
I was really happy with the result of Restore-a-Finish and Feed & Wax. It blended in the small scratches on the top and really made it shine. I definitely did not want to sand or strip this credenza and because of Howard products, I didn't have to!

This Broyhill Brasilia is for sale HERE

1962 Broyhill Brasilia, after restoration

Something Blue

I have sudden desires to paint with certain colors. Right now, it's blue. I'm currently working on a tall boy dresser that matches this low boy  and it will also be in the blue family.

I was doing my usual thrift store shopping at Wings Resale in Palatine, and I saw this beautiful mahogany Maddox desk.. and for only 25 dollars! I instantly saw the potential. The bones were great, hardware in perfect condition. Glass top included. I was beyond excited. It's still for sale HERE !!
Before
After

This next desk was out of my "normal" furniture category. It's fairly new. Not vintage in the slightest, but it was solid wood and was a fun project. I used my favorite stain-over-paint distressing technique and it sold quickly. 
Before

After
Driving through the neighborhood, I spotted a small three-drawer dresser in the garbage. It had really interesting hardware. I wouldn't say it was exactly my style to begin with, but it was solid wood and free.

Tuesday, October 7, 2014

Same Bones, Different Face


I was happy to get a hold of this Hibriten low boy dresser the first time. I was really really happy to get it a second time! Maybe because I love the look of Hepplewhite hardware. It was fun to try something new on the second one. Plus--the second time around I bought the matching highboy with it, that is coming soon :) Which one do you like more?
Before the paint-- the beige marks are wood filler.


Repurposed Army Trunks

My dad's buddy was cleaning out his garage and had two army trunks that he had no use for. They were beaten up, authentic and really interesting. They were both from WWII. I didn't know what I would do with them at first, but knew I would come up with something. I can't take all the credit, I think Pinterest subconsciously implanted the idea in my head to turn them both into coffee tables. It was super easy to turn them from trunks to coffee tables.

Here's what I did:
  1. Cut a 4x4 into 4inch by 4 inch squares.
  2. Prep the legs by priming, painting and sealing
  3. It is best to refinish the trunk completely before attaching the legs
  4. With Gorilla glue, or liquid nails, glue to the bottom of the trunk
  5. Let dry upside down for 24 hours
  6. Turn right side up and use 2-4 screws per leg
  7. That is all folks--you have yourself a trunk coffee table.
    Trunk #1 Before
     
    After


    Trunk #2 Before

    After 
    TIP: Rub petroleum jelly on the spots you want to show. After painting, wipe with a clean rag.